Prerequisites Create the company Email addresses and names of the users to be added. The person to be added will be registered first. This will be done in a meeting.
Application
Create Application in Dashboard
In the “Applications” section you can see all the protected services that have been added to Ironchip and their features. To add a service, click on “New Application”, which will open a new window.
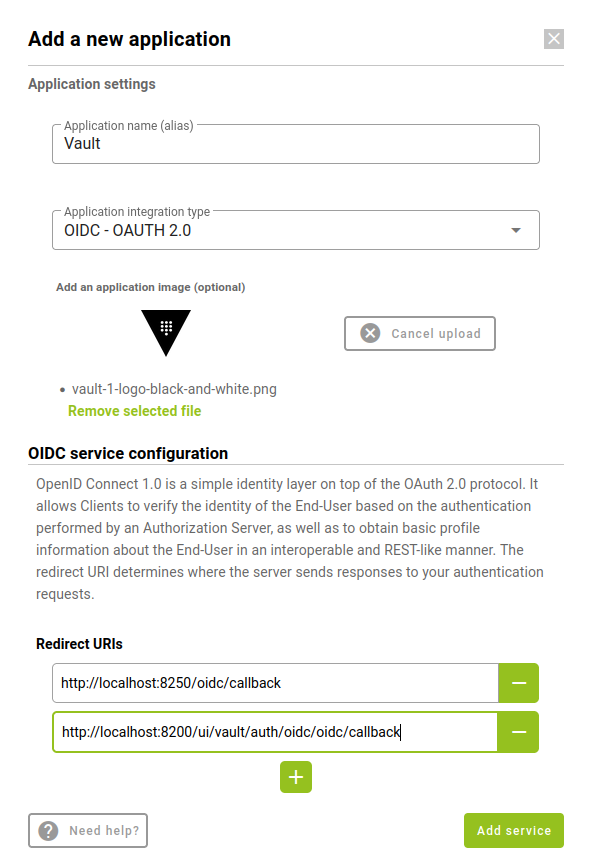
In the new window you will have to choose the new service, in that case click on “Custom Application”. The parameters for new application are:
- Application name
- Integration type: OIDC - OAUTH 2.0
- Redirect URIs:
- http://<your service host>:8250/oidc/callback
- http://<your service host>:8200/ui/vault/auth/oidc/oidc/callback
When all the fields are filled in, click on “Add Service” and the service will be displayed in the corresponding section.
It is important to save the fields that are returned when creating a service. These will only appear this time.
Configuration
OIDC configuration
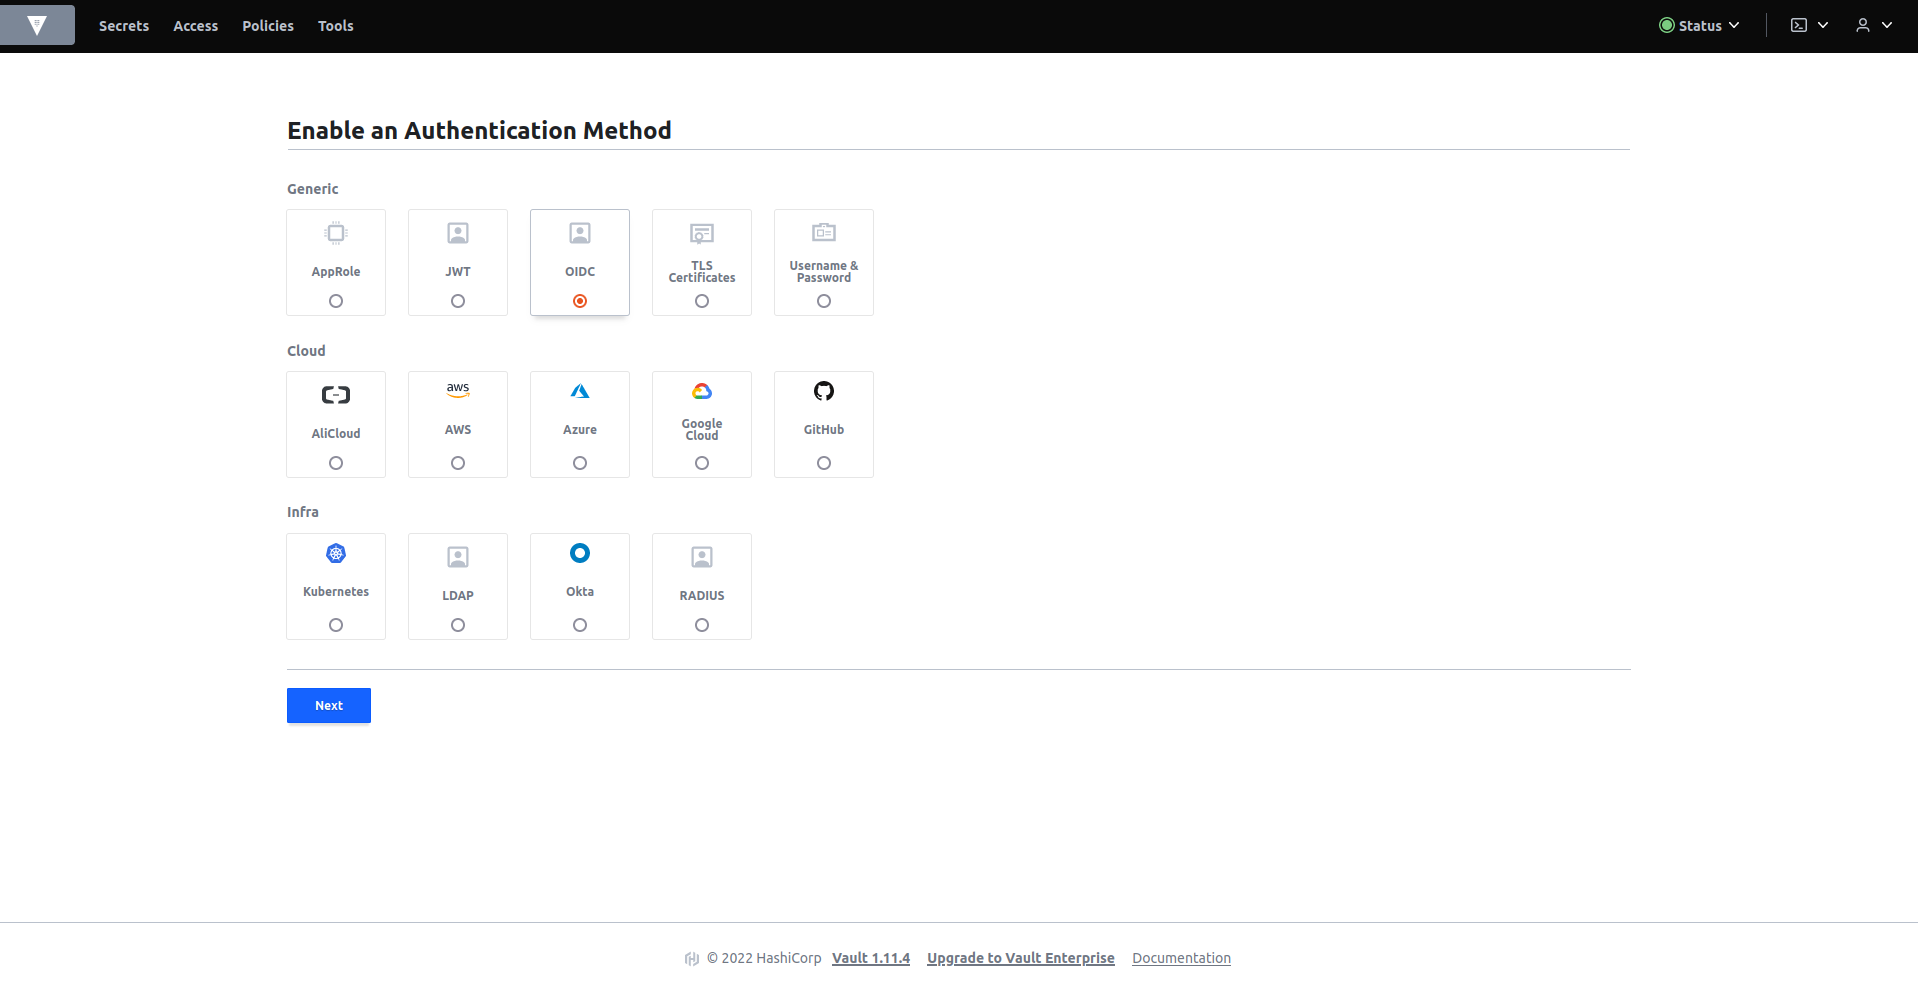
Once inside in the access tab create a new authentication method oidc.
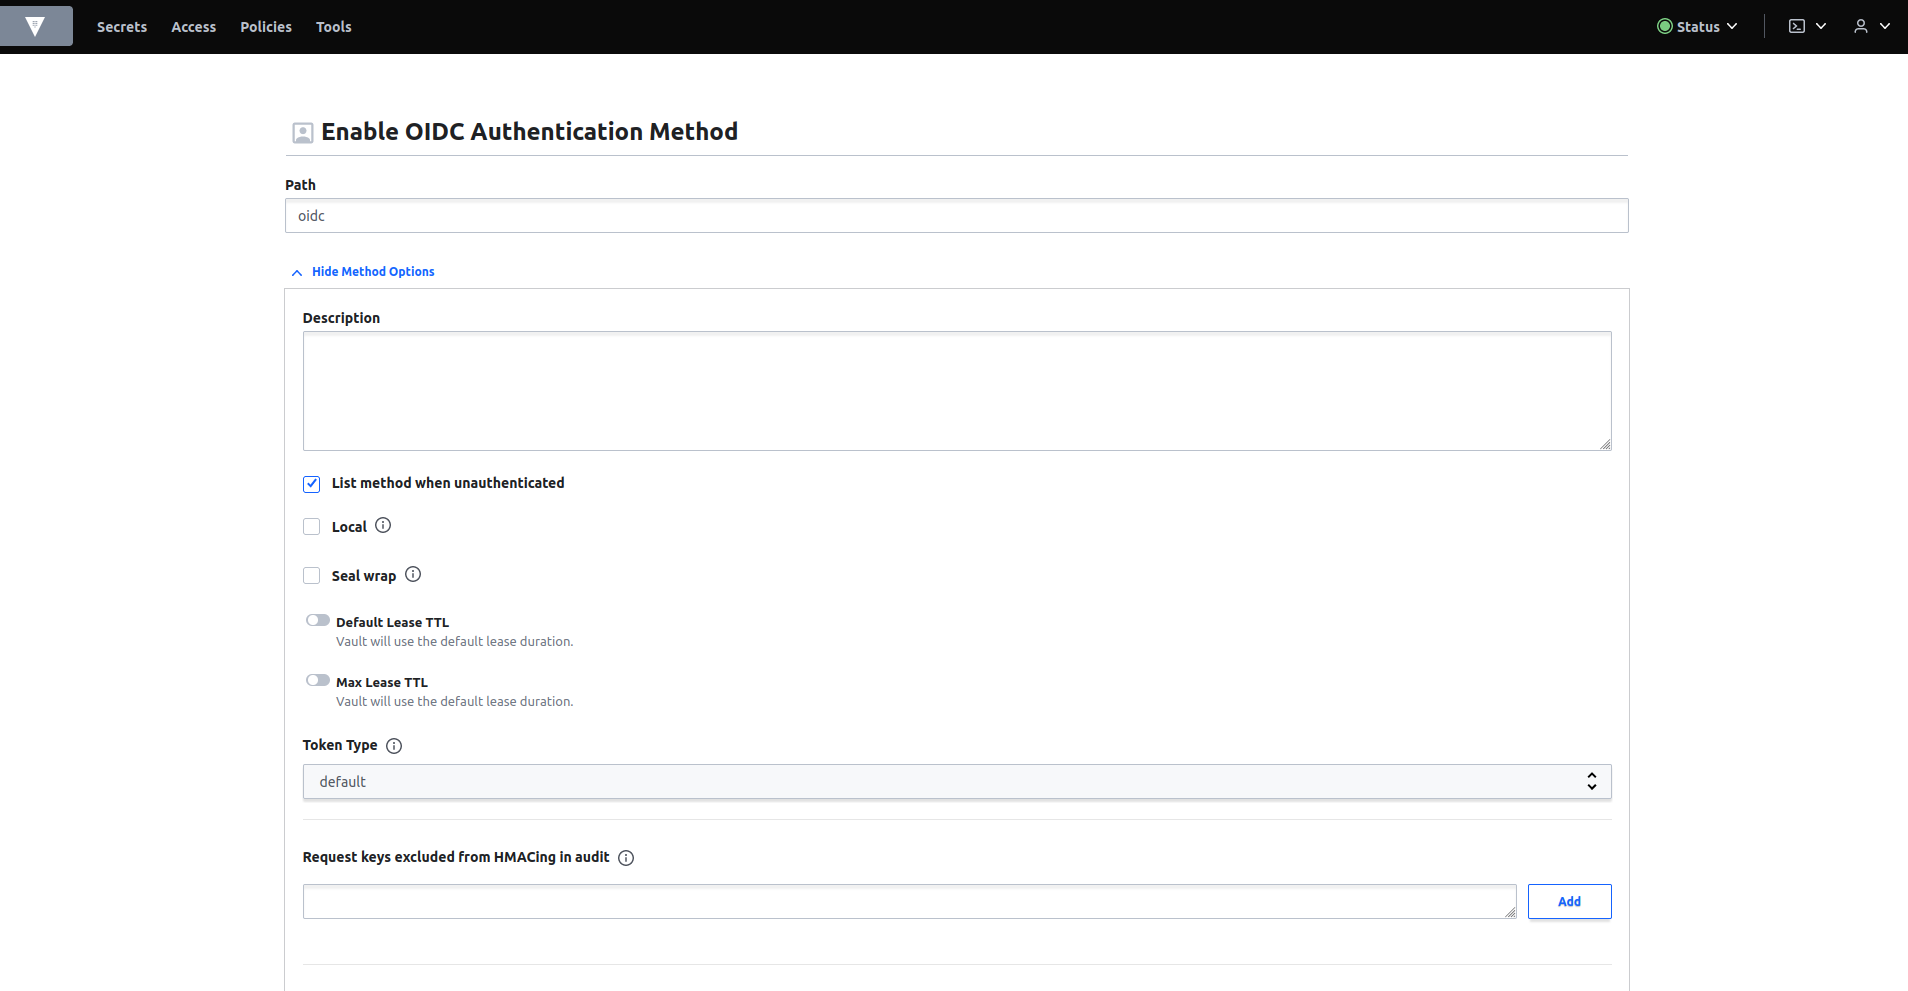
To enable this method please enter the path oidc and enable List method when unauthenticated. Select enable method button.
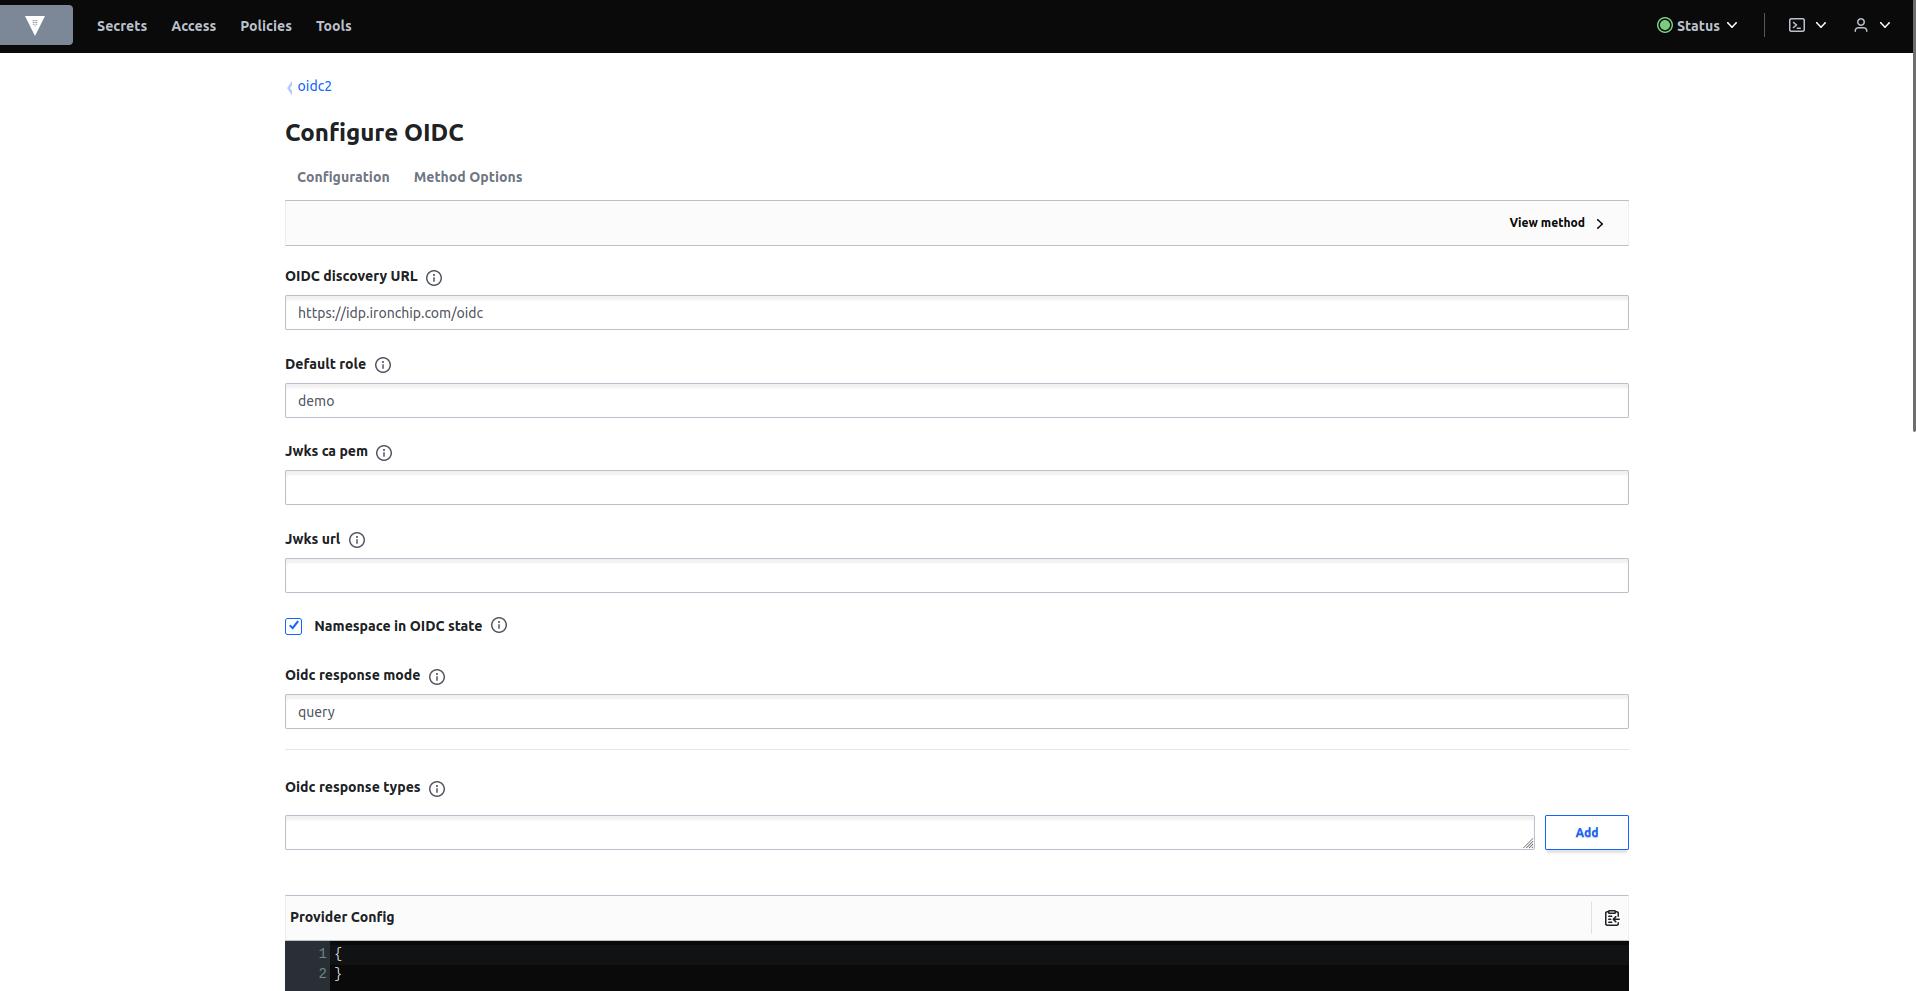
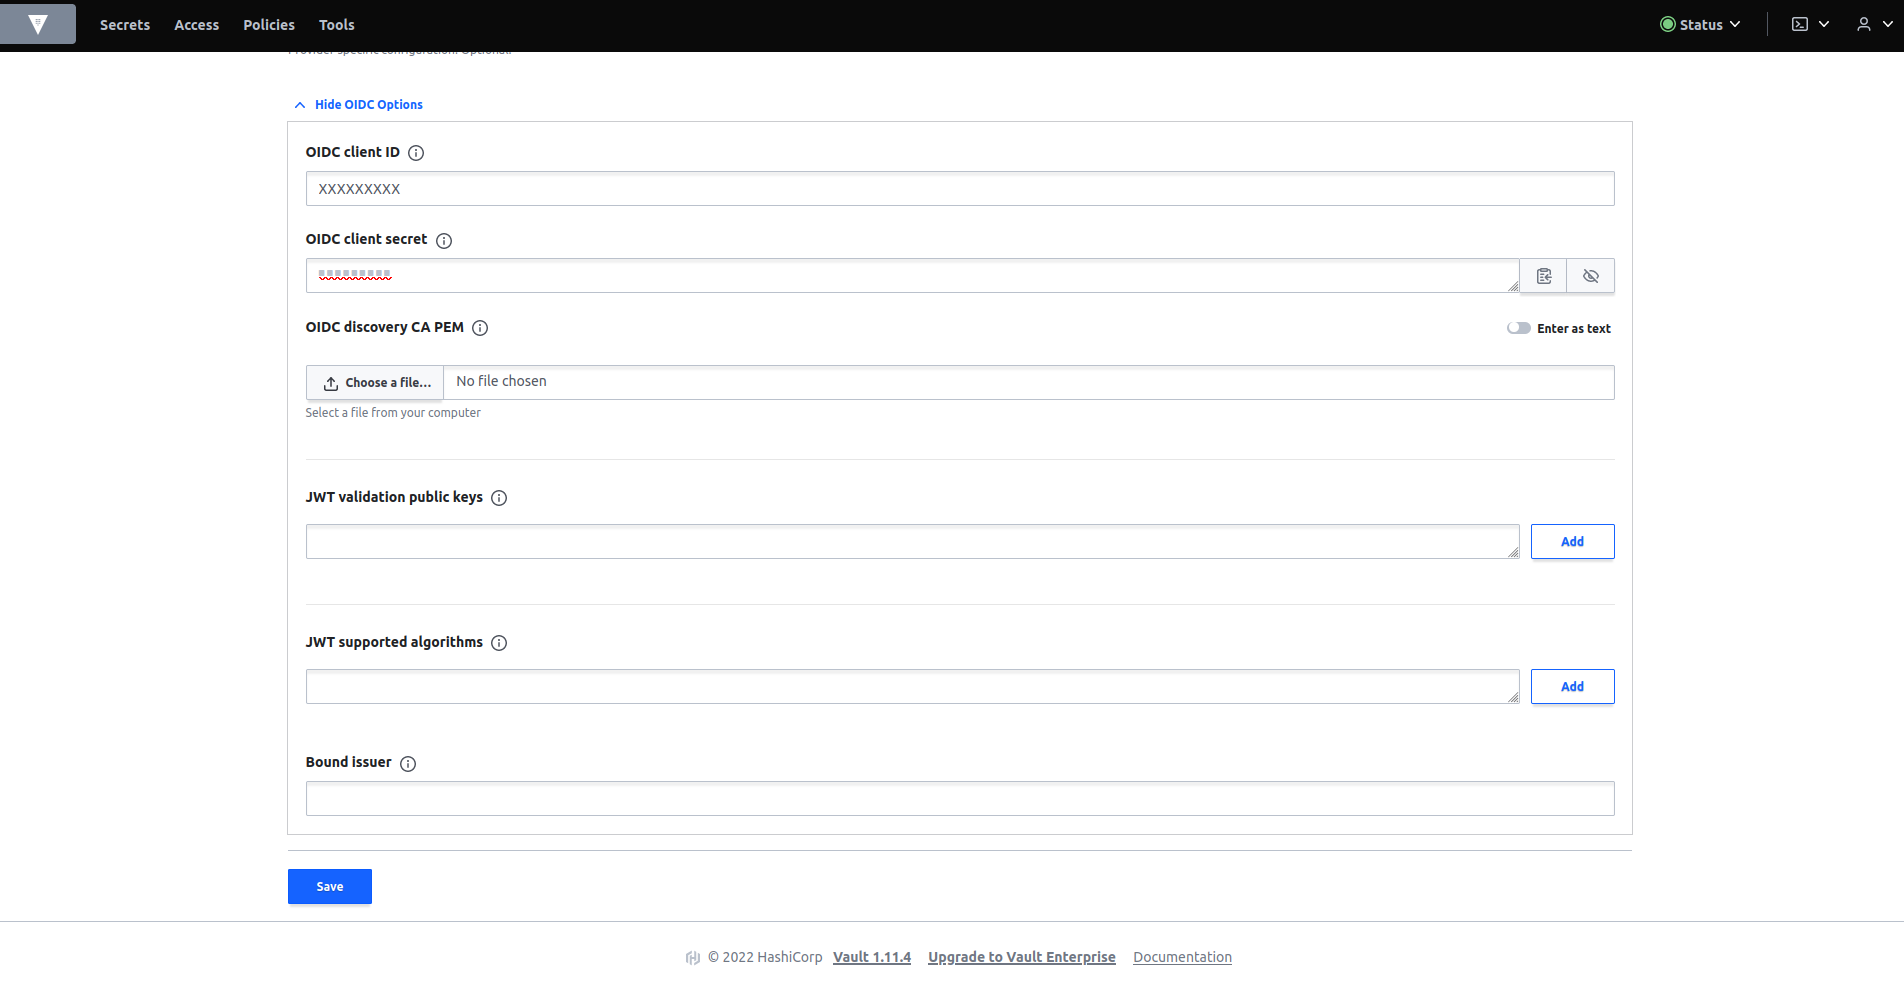
For OIDC configuration fill in the gaps with the following parameters:
- OIDC discovery url : https://idp.ironchip.com/oidc
- Default role : demo
- OIDC response mode : query
- OIDC client ID : The client id returned when creating the application in the Ironchip dashboard.
- OIDC client secret : The client secret returned when creating the application in the Ironchip dashboard.
Select save. You can see how the new oidc authentication method has been created.
Policies
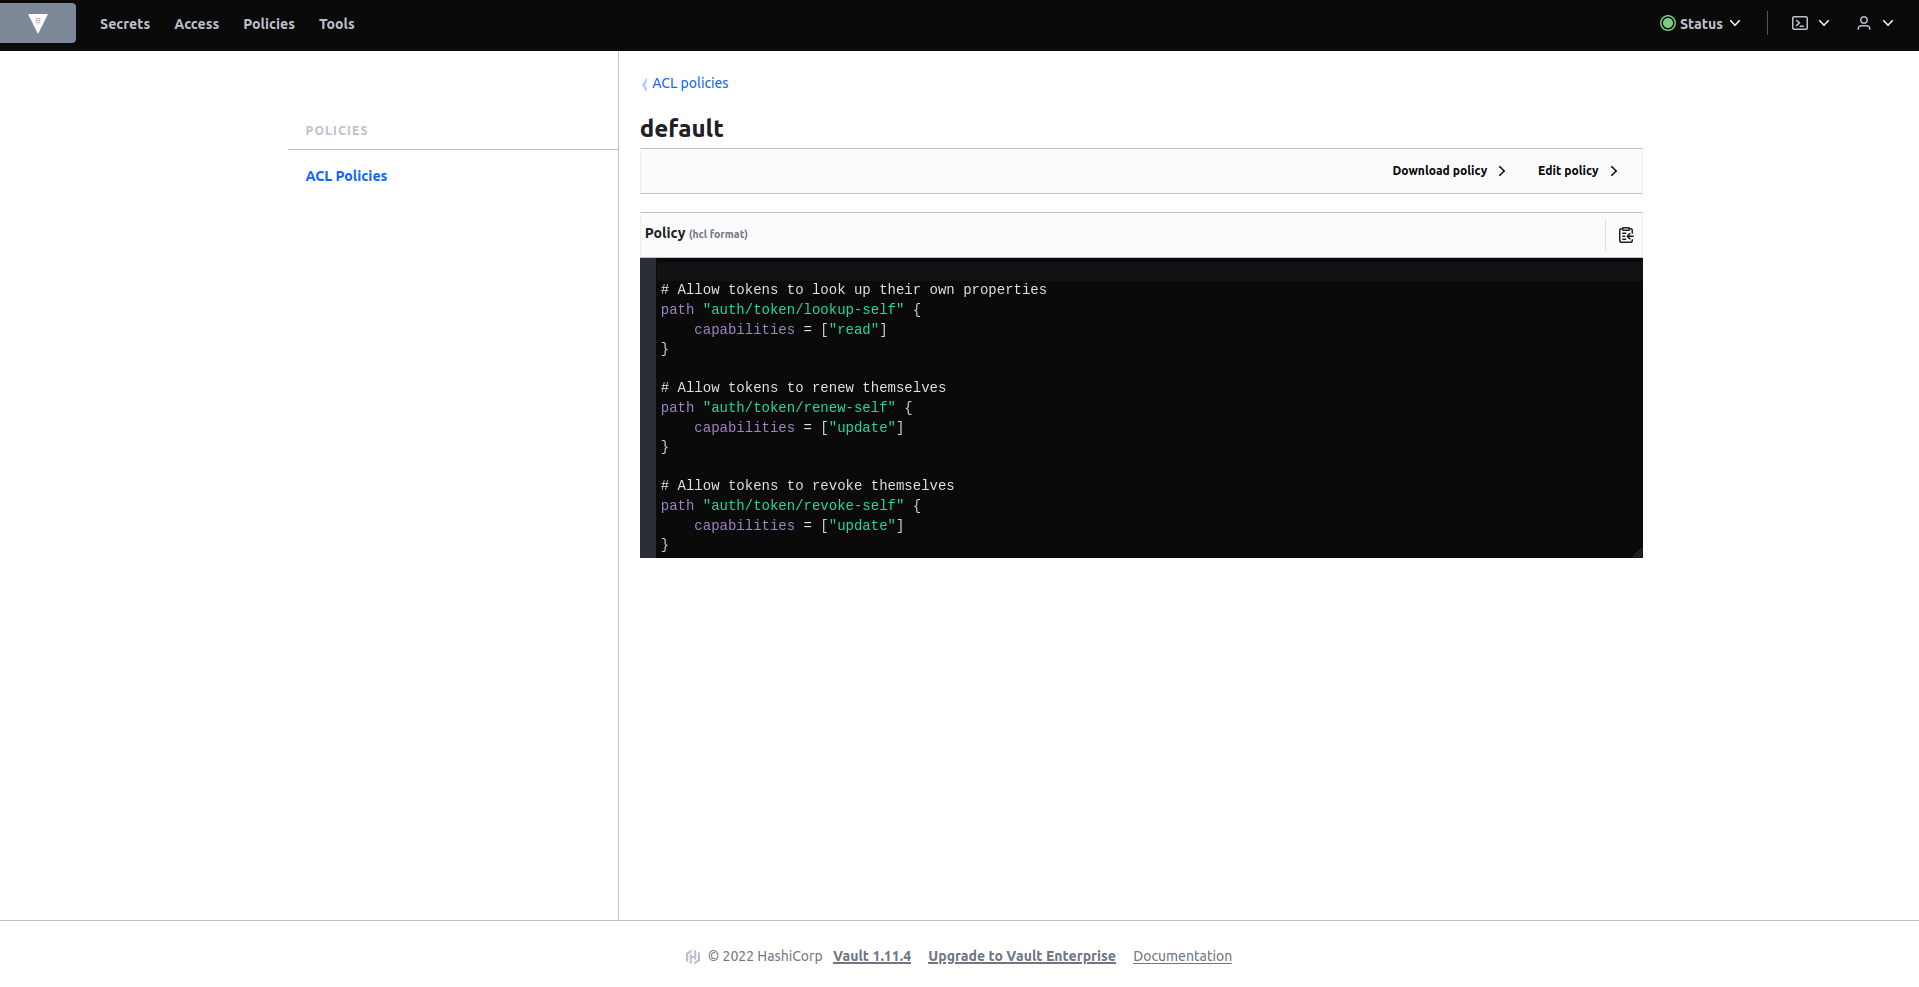
In the policies tab, if there is no policy defined as default, create it with the following content:
# Allow tokens to look up their own properties
path "auth/token/lookup-self" {
    capabilities = ["read"]
}

# Allow tokens to renew themselves
path "auth/token/renew-self" {
    capabilities = ["update"]
}

# Allow tokens to revoke themselves
path "auth/token/revoke-self" {
    capabilities = ["update"]
}

# Allow a token to look up its own capabilities on a path
path "sys/capabilities-self" {
    capabilities = ["update"]
}

# Allow a token to look up its own entity by id or name
path "identity/entity/id/" {
  capabilities = ["read"]
}
path "identity/entity/name/" {
  capabilities = ["read"]
}

# Allow a token to look up its resultant ACL from all policies. This is useful
# for UIs. It is an internal path because the format may change at any time
# based on how the internal ACL features and capabilities change.
path "sys/internal/ui/resultant-acl" {
    capabilities = ["read"]
}

# Allow a token to renew a lease via lease_id in the request body; old path for
# old clients, new path for newer
path "sys/renew" {
    capabilities = ["update"]
}
path "sys/leases/renew" {
    capabilities = ["update"]
}

# Allow looking up lease properties. This requires knowing the lease ID ahead
# of time and does not divulge any sensitive information.
path "sys/leases/lookup" {
    capabilities = ["update"]
}

# Allow a token to manage its own cubbyhole
path "cubbyhole/*" {
    capabilities = ["create", "read", "update", "delete", "list"]
}

# Allow a token to wrap arbitrary values in a response-wrapping token
path "sys/wrapping/wrap" {
    capabilities = ["update"]
}

# Allow a token to look up the creation time and TTL of a given
# response-wrapping token
path "sys/wrapping/lookup" {
    capabilities = ["update"]
}

# Allow a token to unwrap a response-wrapping token. This is a convenience to
# avoid client token swapping since this is also part of the response wrapping
# policy.
path "sys/wrapping/unwrap" {
    capabilities = ["update"]
}

# Allow general purpose tools
path "sys/tools/hash" {
    capabilities = ["update"]
}
path "sys/tools/hash/*" {
    capabilities = ["update"]
}

# Allow checking the status of a Control Group request if the user has the
# accessor
path "sys/control-group/request" {
    capabilities = ["update"]
}

# Allow a token to make requests to the Authorization Endpoint for OIDC providers.
path "identity/oidc/provider/+/authorize" {
	capabilities = ["read", "update"]
}
This policy is for ordinary users, who will not have access to the policies tab. If you want to configure an administrator user, a policy with the following content will be created:
path "sys/health" { capabilities = ["read", "sudo"] } path "sys/policies/acl" { capabilities = ["list"] } path "sys/policies/acl/*" { capabilities = ["create", "read", "update", "delete", "list", "sudo"] } path "auth/*" { capabilities = ["create", "read", "update", "delete", "list", "sudo"] } path "sys/auth/*" { capabilities = ["create", "update", "delete", "sudo"] } path "sys/auth" { capabilities = ["read"] } path "secret/*" { capabilities = ["create", "read", "update", "delete", "list", "sudo"] } path "sys/mounts/*" { capabilities = ["create", "read", "update", "delete", "list", "sudo"] } path "sys/mounts" { capabilities = ["read"] }Roles
As policy have been defined we will create a role according to the previous one. This will be done through the terminal enabled in the Vault application.
For the common user you will create DEMO role with the following comand (Don’t forget to fill in the Client id):
vault write auth/oidc/role/demo \
        bound_audiences="CLIENT_ID" \
        allowed_redirect_uris="http://<your service host>:8200/ui/vault/auth/oidc/oidc/callback" \
        allowed_redirect_uris="http://<your service host>:8250/oidc/callback" \
        user_claim="sub" \
        policies="default" \
        verbose_oidc_logging="true"
For the administrator you will create ADMIN role with the following comand (Don’t forget to fill in the Client id):
vault write auth/oidc/role/admin \
        bound_audiences="CLIENT_ID" \
        allowed_redirect_uris="http://<your service host>:8200/ui/vault/auth/oidc/oidc/callback" \
        allowed_redirect_uris="http://<your service host>:8250/oidc/callback" \
        user_claim="sub" \
        policies="admin" \
        verbose_oidc_logging="true"
It is important to remember that the user set as default in the oidc configuration does not need to be entered in the log in, but in this case to log in as administrator it would be necessary to enter the role.